
Roof Replacement in Port St. Lucie, FL: What to Expect, Step by Step
A clear walkthrough of the roof replacement process in Port St. Lucie, from inspection and permits to tear off, dry in, install, final inspection, and warranty registration.
A roof replacement in Port St. Lucie is usually installed in one to three days once the permit and materials are ready, but the full process from first inspection to the final St. Lucie County inspection typically runs about two to five weeks. The steps are the inspection and documentation, written scope and estimate, county permit, material delivery, tear off, dry in waterproofing layer, install, cleanup and magnetic sweep, final inspection, and warranty registration. An insurance claim or a My Safe Florida Home grant can add time at the front end. JA Edwards of America runs its Port St. Lucie office at 540 NW University Blvd, and you can reach the team at (772) 204-2452.

Most homeowners in Port St. Lucie have never watched a roof get replaced, so the whole thing feels like a black box. You sign an estimate, a crew shows up at some point, there is noise for a day or two, and then it is done. That uncertainty is where a lot of stress comes from, and it is also where bad contractors hide, because if you do not know what is supposed to happen, you cannot tell when a step gets skipped.
This walkthrough takes you through a Port St. Lucie roof replacement the way it actually unfolds, step by step, so you know what each phase is for and what good work looks like at every stage. We are deliberately keeping pricing out of this guide, because we already broke down real local numbers in our Port St. Lucie roof replacement cost guide. Here the focus is the process and the timeline.
Why the process has a few extra steps on the Treasure Coast
Port St. Lucie sits where Atlantic systems converge, and that geography shapes everything about how a roof gets built and inspected here. The wind loads are higher than inland Florida, the salt carried in off the coast is harder on metal components, and the insurance environment puts real weight on documentation. Many homeowners here carry Citizens Insurance, and Citizens and most private carriers want a clear paper trail showing the roof was installed to code, inspected, and registered. That means a replacement on the Treasure Coast involves more verification than a simple tear off and re cover, and the contractor who treats those steps as optional is the one who creates problems later.
None of this should slow you down or scare you. It just means the steps below exist for a reason, and skipping them to move faster is a false economy.
Roof condition, photos, vulnerabilities, and documentation before the scope is built.
The contractor files the permit so the county inspection process protects the homeowner.
The old roof comes off, decking gets exposed, and hidden wood damage is addressed.
The waterproofing layer goes down so the home is protected before the visible roof system is installed.
County sign-off, cleanup, magnetic sweep, and warranty registration close the job properly.
Step one: the inspection and documentation
Everything starts on the roof. A proper inspection is not a glance from the driveway. The inspector gets on the roof, checks the field of the shingles, the valleys, the flashing around every penetration, the condition of the decking where it can be assessed, and the ventilation. In Port St. Lucie the inspector is also looking for the early salt and wind damage that shows up around edges and ridges before it shows up anywhere else.
The output of this step is a photo report. You want one. It is the document that supports an insurance claim, sets the scope of the work, and gives you a record of the roof's actual condition. Our Port St. Lucie roofing inspections come with that report, and it is yours to keep whether or not you move forward.
Step two: the written scope and estimate
Once the roof is documented, you get a written scope. This is where you see exactly what is being replaced and with what. The scope should name the shingle or tile product, the underlayment, the drip edge and flashing, the ventilation plan, and whether the price includes the permit and the county inspection. It should also address what happens if the crew finds rotten or delaminated decking once the old roof comes off, which is common in our humidity and salt air.
If you are weighing materials, the Treasure Coast has its own answer to what holds up, and we cover it in our guide on the best roofing materials for the Treasure Coast. The right choice here balances wind rating, salt resistance, and what your insurance will credit you for.
Step three: the permit and St. Lucie County
A roof replacement in Port St. Lucie requires a permit, and a legitimate contractor pulls it under its own license, never asks you to pull an owner permit. The permit is filed with the St. Lucie County or City of Port St. Lucie building department depending on your address, and it triggers the inspections that protect you. You can read the local requirements directly through the St. Lucie County building division, and your contractor handles the filing.
Permitting is usually the part of the timeline you cannot fully control, because it depends on the county's queue. This is the main reason the front end of a replacement can stretch from a few days to a couple of weeks. It is also why a contractor who promises to start tomorrow with no permit talk is a warning sign, not a convenience.
Step four: material delivery
A day or so before the install, the materials arrive and are staged, usually loaded onto the roof or set in the driveway. Seeing the right products show up is a small but real checkpoint. The brand and product line on the delivery should match what your scope promised. If you ordered a specific wind rated shingle and something else arrives, that is the moment to ask questions, before it goes on your house rather than after.
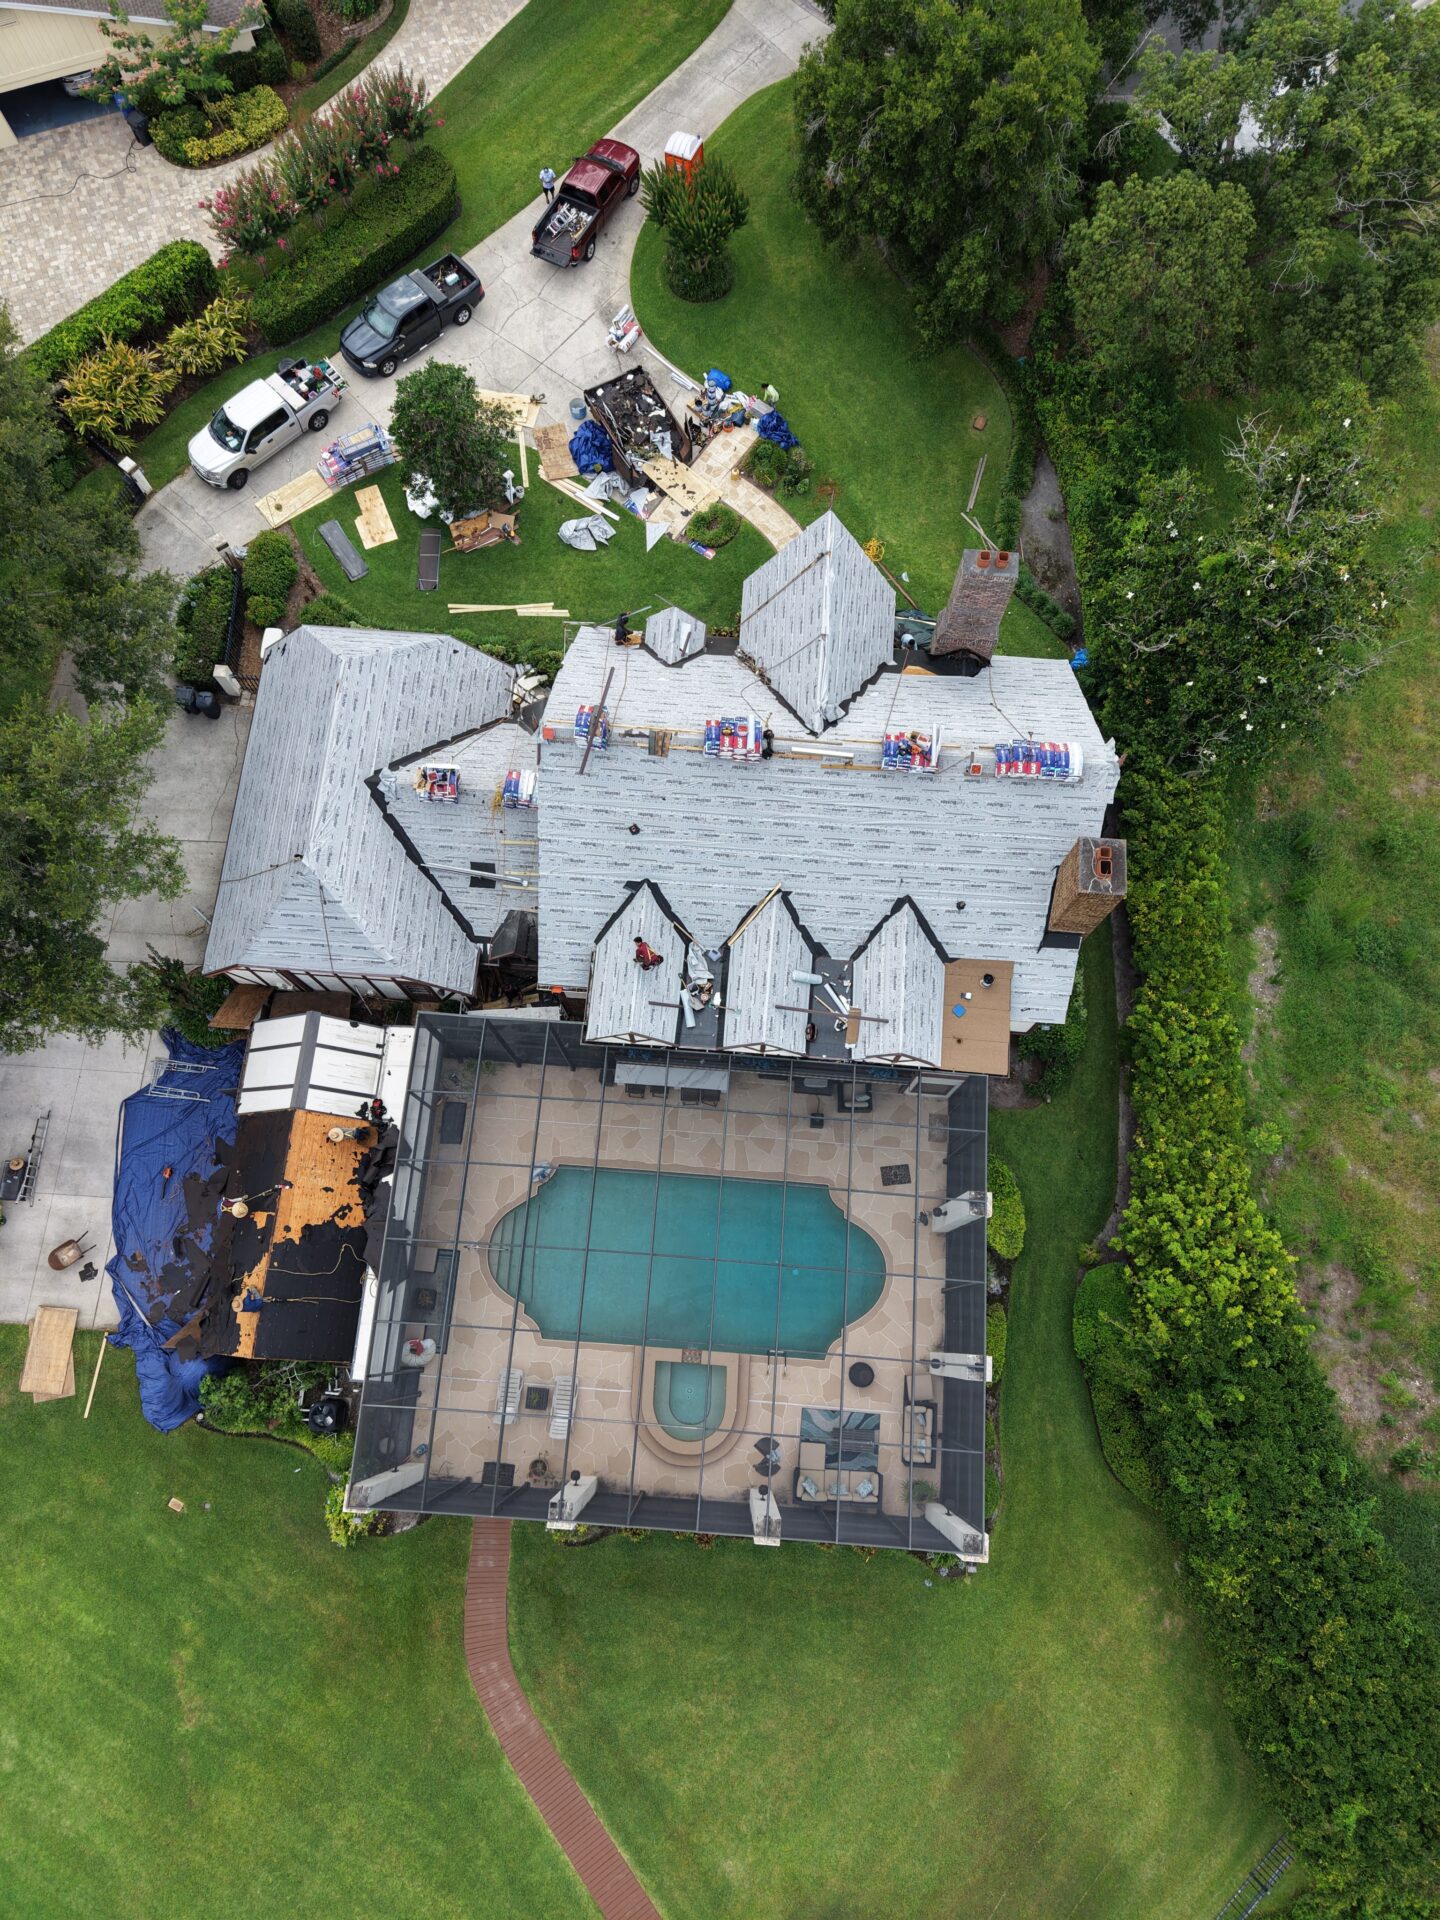
Step five: tear off day
This is the loud day. The crew strips the existing roof down to the decking, clears every old nail, and exposes the wood underneath. Tear off matters more than people assume, because a re cover that traps an old failing layer hides problems instead of fixing them. With the deck exposed, the crew inspects it, and any soft, rotten, or delaminated sheathing gets replaced. In Port St. Lucie's climate this is where surprises surface, and a good contractor shows you the bad decking and documents the replacement rather than quietly covering it.
Before your roof gets opened up, know the process.
Get a free Port St. Lucie roof inspection with a written photo report, clear scope, and realistic timeline before you approve the work.
Step six: the dry in, the layer that actually waterproofs your home
Once the deck is sound, the crew installs the dry in. This is the underlayment and the waterproofing membrane, and it is the single most important layer for keeping water out. Shingles and tile are the wear surface and the part you see, but the dry in is what stands between a wind driven Atlantic rain and your ceiling. On the Treasure Coast, where storms push water sideways, the quality of this layer is the difference between a roof that survives a season and one that leaks at the first hard blow. A roof is generally dried in by the end of the same day the tear off happens, which is why crews work to get the old roof off and the membrane down before they leave, so your home is never left exposed overnight.
Step seven: the installation
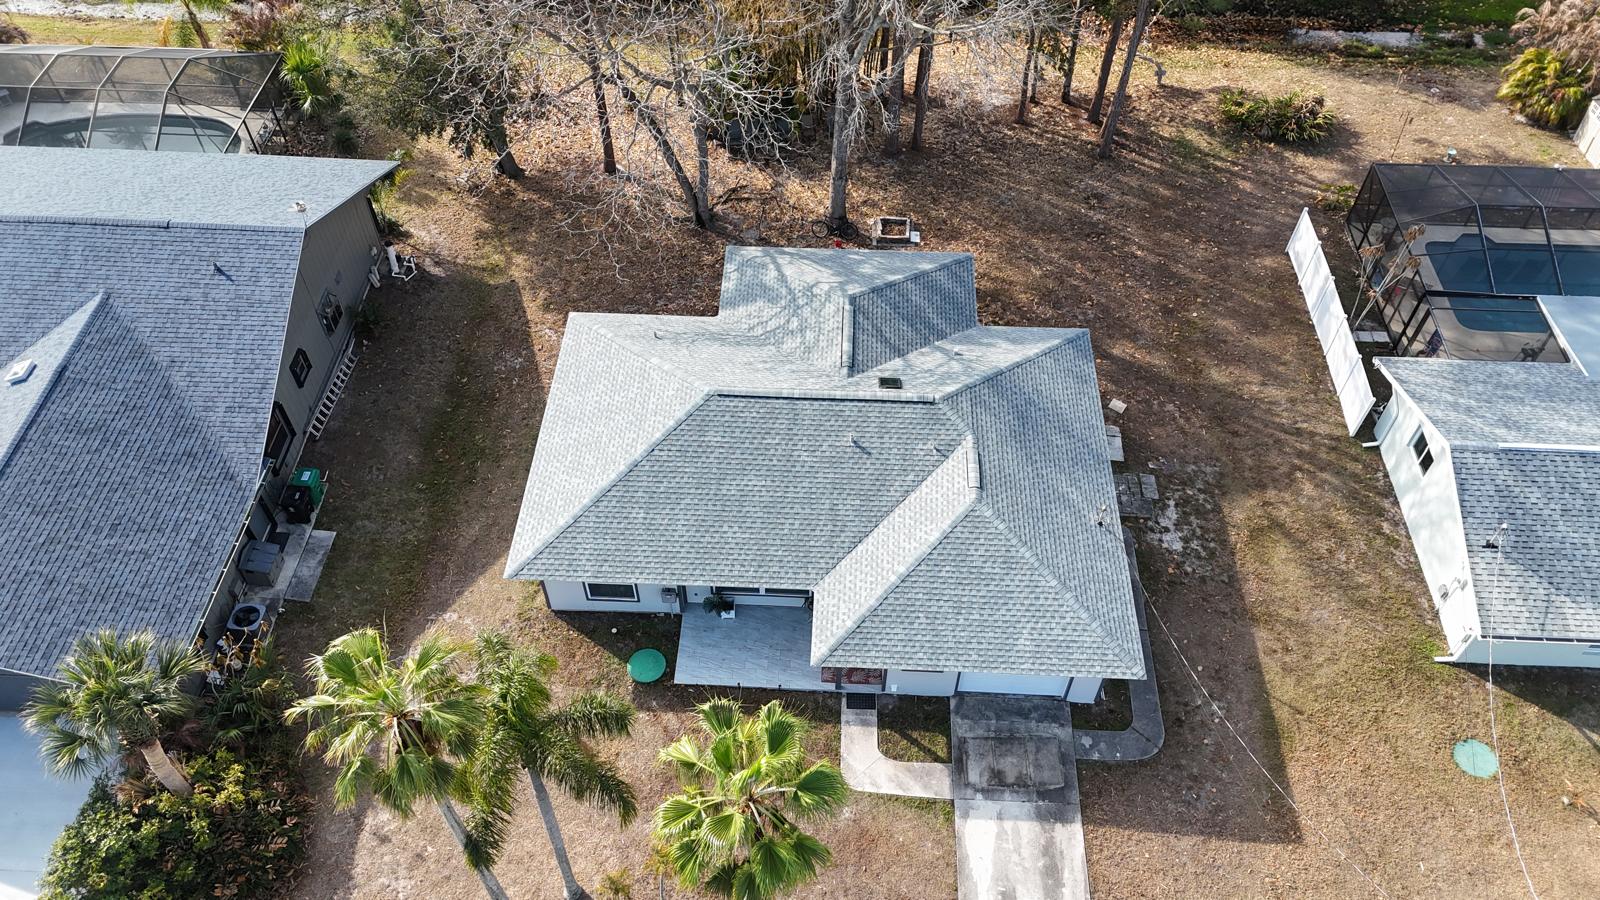
With the home watertight, the crew installs the new roof. For shingles this is the field installation, the ridge caps, the flashing reset around every penetration, and the ventilation. For tile the process takes longer and involves battens and a heavier load. Either way, the flashing details are where workmanship shows. Most roof leaks do not start in the open field of the roof, they start where the roof meets a chimney, a vent, a skylight, or a wall, and those transitions are exactly where a rushed crew cuts corners.
For most Port St. Lucie homes the install is wrapped up within the one to three day window. Larger or more complex roofs, and tile roofs especially, can run longer.
Step eight: cleanup and the magnetic sweep
A finished job includes a clean yard. The crew hauls off the old material, and a proper cleanup ends with a magnetic sweep of your lawn, driveway, and flower beds to pull up stray nails, which protects your tires, your feet, and your pets. This step is easy to skip and easy to notice. A yard left with debris and nails tells you what kind of operation you hired.
Step nine: the final county inspection and warranty registration
The job is not truly done until St. Lucie County signs off. A county inspector verifies the roof was installed to code, and that final inspection is what closes out the permit. This is the documentation your insurance carrier wants to see, and it is the reason the permit step at the beginning matters so much. After the final passes, your contractor registers the manufacturer warranty. As a GAF Master Elite contractor, JA Edwards of America can register enhanced coverage that a standard installer cannot, which is part of why the credential is worth checking before you hire anyone.
What separates a clean install from a rushed one
Two crews can replace the same roof and leave behind very different work, and most of the difference is invisible from the ground. The tells are in the details that do not photograph well in a brochure. A clean install resets the flashing around every penetration rather than reusing bent or corroded pieces, because reused flashing is one of the most common sources of a leak that appears a year later. It follows the manufacturer's nailing pattern and ventilation plan instead of improvising, since under installed fasteners are exactly what a Treasure Coast wind load finds first. It leaves the valleys and the drip edge crisp, and it does not bury an old problem under a new surface. When you are standing in your driveway watching the work, the things to notice are whether the crew is replacing the flashing, whether they stopped to address bad decking, and whether they dried the roof in before leaving. Those three habits separate a roof that lasts from one that merely looks finished.
How insurance and the My Safe Florida Home grant change the timeline
If your replacement is tied to an insurance claim, the front end gets longer, because the scope has to be agreed with your adjuster before the work can be approved. A contractor who can produce a clear inspection report and meet your adjuster speeds this up considerably. For storm related damage and emergency situations, our storm damage repair team responds quickly across the Treasure Coast.
If you are pursuing the My Safe Florida Home grant, which can put up to ten thousand dollars toward a hurricane resistant roof, that adds an application and inspection step at the start. It is worth the wait for many homeowners, and we walk through eligibility in our guide on the My Safe Florida Home grant for Port St. Lucie homeowners. Planning for that step up front keeps it from feeling like a delay.
A realistic timeline, start to finish
For a straightforward cash or financed replacement with no claim, expect roughly two to three weeks from signed estimate to final inspection, with the actual install taking one to three days inside that window. Add a week or more if permitting runs slow, and add more if an insurance claim or a grant application is part of the picture. Anyone promising a same week start with none of these steps is skipping something you will want later.
When you are ready to see what your specific roof needs and how the timeline lays out for your home, the Port St. Lucie office is at (772) 204-2452, and the inspection comes with a photo report that is yours to keep with no pressure either way.
Frequently Asked Questions
The install itself is usually one to three days once permits and materials are ready. The full process from first inspection to the final St. Lucie County inspection generally runs two to five weeks, with permitting and any insurance claim driving most of the variation.
Yes. A roof replacement requires a permit filed with the local building department, and your contractor should pull it under its own license. The permit triggers the county inspections that protect you and that your insurance carrier will want to see.
Most homeowners stay home. Tear off day is loud and there will be debris and crew activity around the house, so it helps to move vehicles out of the driveway and keep pets indoors and away from the work zone.
Crews work to tear off and dry in the roof on the same day so your home is never left exposed overnight. The dry in waterproofing layer protects the home between phases, and serious weather can pause the install until conditions are safe.
It depends on the cause and the age of the roof. Storm and sudden damage are commonly covered, while wear and age often are not. A documented inspection report supports your claim, and you can choose your own licensed contractor rather than only the insurer's vendor.
It is a Florida program that can provide up to ten thousand dollars toward a hurricane resistant roof for eligible homeowners. It adds an application and inspection step at the start of the process, so plan for that time when you are pursuing it.
The best choice balances wind rating, salt resistance, and insurance credit. Shingle, tile, and metal each have a place here depending on the home, and the right pick is the one rated for Port St. Lucie's wind loads and coastal exposure.
Once the estimate is approved, the main thing standing between you and a start date is the permit and material delivery, which together usually take several days to a couple of weeks depending on the county queue. Storm response and emergency repairs move faster.
Get your Port St. Lucie roof inspected before the replacement starts
A free inspection gives you a clear photo report, written scope, and realistic timeline before your roof is opened up.